So as I mentioned in my previous post about desk detection, I recently redid my office and installed some cabinets. The lighting was OK but I really wanted some extra light (and at times, pizazz!) and had seen a lot of people talking about individually addressable LEDs. So I decided to start off with a small project and see how it went. I also was tired of dealing with my outside solar-powered pathway lights that only worked half the time and just looked eh so decided to install some LED strips outside.
I learned a LOT from both projects and interestingly though I tried to wire them the same they both ended up with different set ups because I used different software on the ESP boards. This one is going to be quite long and have a lot of pictures/diagrams/links to videos.
Introduction
Ok, so let’s start with the obvious question. What is an individually addressable LED? There are two kinds of LEDs out there. The first is the ones you see with a remote that can change to lots of colors, but the entire strip is a single color. Individually addressable are, surprise, strips where each individual LED can be a different color or on/off. This is what you see when you see light shows like this on peoples house for the holidays:
Now I’m not saying setting up a show like that is easy (that’s a whole other category than what I’m doing here). For most home automation projects you’ll want individually addressable LEDs. They’re cheap, easy to use (once you figure it out), and can be controlled by an ESP8266/ESP32. Plus, they’re lots of fun!
Hardware
There are a lot of options when it comes to individually addressable LEDs. Dr. Zzs does a terrific breakdown of the different types and the things you should consider. It’s geared more towards an outdoor LED display (and goes into more than just the hardware, we’ll get to the rest of it below) but there’s some good info on the LEDs themselves in here:
You may have already seen this next one because Dr. Zzs mentions/links to it in his video but here’s a great rundown of the different varieties of LEDs (warning, it’s somewhat technical but makes for a great watch):
And just one more for good measure that’s also holiday-ish focused but has a lot of useful info:
In summary, here are the things to consider:
- Strings versus strips2) 5v versus 12v3) Power supply4) If strips, what kind of waterproofing (personal suggestion is <IP30 for anything inside and IP65 for outside (IP67 is kinda overkill and harder to work with).
For my project I ended up using WS2812B 5v strips. I did end up getting a set of 5v bulbs, but we’ll get to why in a bit. Here’s the rest of what you’ll need
- ESP8266 NodeMCU (3-pack) - $13.99 (Assuming you don’t already have from a previous project)
- Electrical wire - Anywhere from 18-22 gauge wire is fine. The higher gauge/thinner wire (like 22 gauge) works for small projects. If you’re doing a large or outdoor project, get lower/thicker gauge wire (like 18 gauge)
- Soldering iron - $15.99 (optional depending on how you chose to resolve the problem I’ll explain below with data wire corruption).
- Jumper cables - $6.98 (this should be plenty for several projects and gives you options for male-male, female-female, and male-female connectors)
- LEDs! I’m not going to make any particular recommendations here since there’s a ton. Just search on eBay, Amazon, or AliExpress and you’ll find a ton. I’ve bought Chinly, Alitove, and BTF-Lighting and all are good.
- Power Supply - As Dr. Zzs explained, the size of your power supply will be dictated by how many LEDs you want to power. His “Zzimple rule” of 50 LEDs per amp is decent though know you want to do white light at higher brightness, budget for more amps (maybe more like 30 LEDs per amp).
For my outdoor project, I added the following:
- Waterproof outdoor box - $22.99. I like this one, though it’s HUGE. There are smaller sizes (I got the large) so get whatever size you need.
- Aluminum Cord channel - ~$35.00 for 10m of channel. You pick what you like best. Just be aware that there are differing levels of “diffusion” (ie how hard is it to see the individual LEDs). How strong a diffuser you want will depend on your use case and personal preferences. I like the Muzata ones I got, you find what works for you.
Software
There are two popular options for controlling LEDs: ESP Home and WLED. Both require flashing the ESP board with custom firmware (ESP Home is a bit easier here but WLED can use the ESP flasher software so it’s not that much of an advantage and both integrate very painlessly as integrations in HomeAssistant (as simple as entering the IP address of the ESP board) so don’t let that drive your decision. I’ve used both and here’s my 2 cents.
ESP Home
ESP Home is absolutely fantastic for doing a LOT of things with ESP boards, as I’ve covered before. It’s strength is its flexibility and simplicity. But that’s also a drawback for LEDs, depending on your use case. If you want a lot of fun light effects, then while ESP Home has a number of effects, they aren’t quite as much fun as WLED’s without some effort. But if all you’re looking for is a simple LED setup I think ESP Home is perfect. For my office setup it was really great because I got to use the same ESP board that I use for detecting brightness. If I’d wanted to use WLED I would have needed 2 separate ESP boards since I wanted individual strip control and WLED can only use a single data pin (D4). More on this below (sorry for being a tease).
I suggest using the FastLED library though some people claim better results with the NeoPixelBus library. Both worked fine for me so pick whichever you prefer.
One other tip, you can set up “light partitions” which essentially are different segments of lights. That took me a bit to find but was very useful.
WLED
WLED is brilliant. Absolutely brilliant. There are SO MANY EFFECTS it’s hard to find which one is my favorite. WLED has an Android app that’s very easy to use and WLED allows syncing of the controller with other WLED controllers so you can have the same effects running on different strips, all controlled from one spot. Handy for light shows. You also can sync with Alexa and Hue natively which is also useful for some (not for me).
The main drawback to WLED IMO is that you can only use a single data pin (D4) without recompliling the code yourself (at least that’s my understanding, please someone correct me if I’m wrong!). It also has so many bells/whistles that for a simple LED strip it’s kinda overkill.
Which one?
Again, I think both have their use cases. Want a fun light show with cool effects to impress your friends? Go with WLED. Looking for simplicity? ESP Home is the way to go.
Wiring it Up
This is definitely the most complicated part and the part I struggled the most with. Maybe you’re better at understanding electrical wiring than I am but it just took me a lot of time to wrap my head around some of the concepts/how to wire things.
There’s 3 wires you need to deal with. 5 volts (usually red), ground (usually white) and data (I see it normally as green). Below is a wiring diagram for a basic setup.
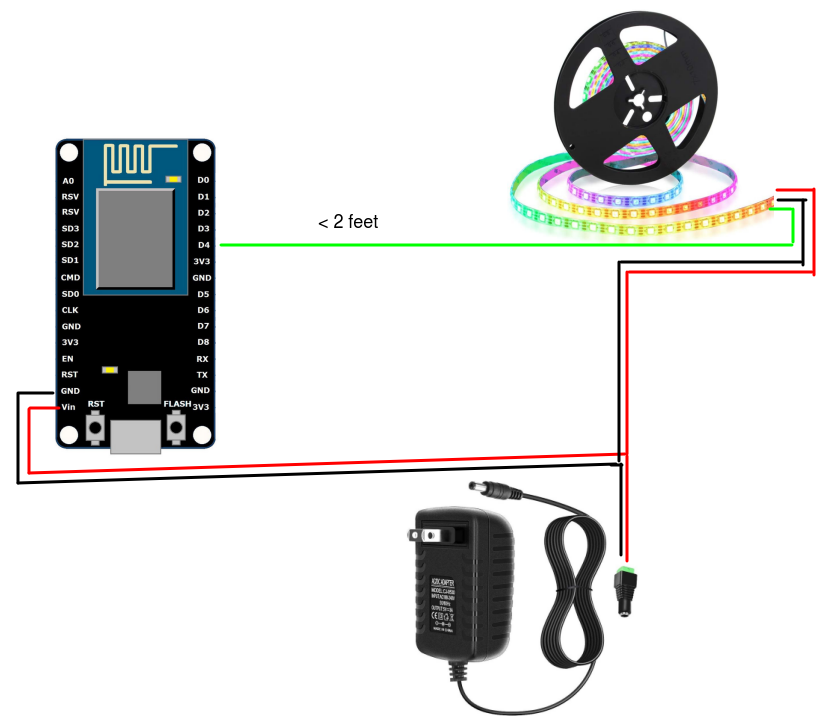
Basic LED wiring setup
A few notes here. First, DO NOT TRY TO POWER YOUR LEDS OFF OF USB POWER TO THE ESP BOARD. You will let out the magic smoke and will have a dead board (ask me how I know…). You can power the ESP board off your power supply by connecting it the 5v wire to the VIN pin on the ESP and ground to a ground pin on the ESP. Second, I have the data wire running off D4. Remember for WLED that’s a requirement, but for ESP Home you aren’t restricted to just D4 (there’s a few limitations but a few of them will work). Third, you may have noticed the “<2 feet” comment next to the data wire. This is because if your data wire is too long (basically 2ish feet on 5v), the data signal can get corrupted and the result will be flickering/screwy LEDs.
The Hook Up has a pretty good technical explanation of what the issue is and a solution using a logic level shifter (jump to about 1:30 into the video):
Here’s a wiring diagram:
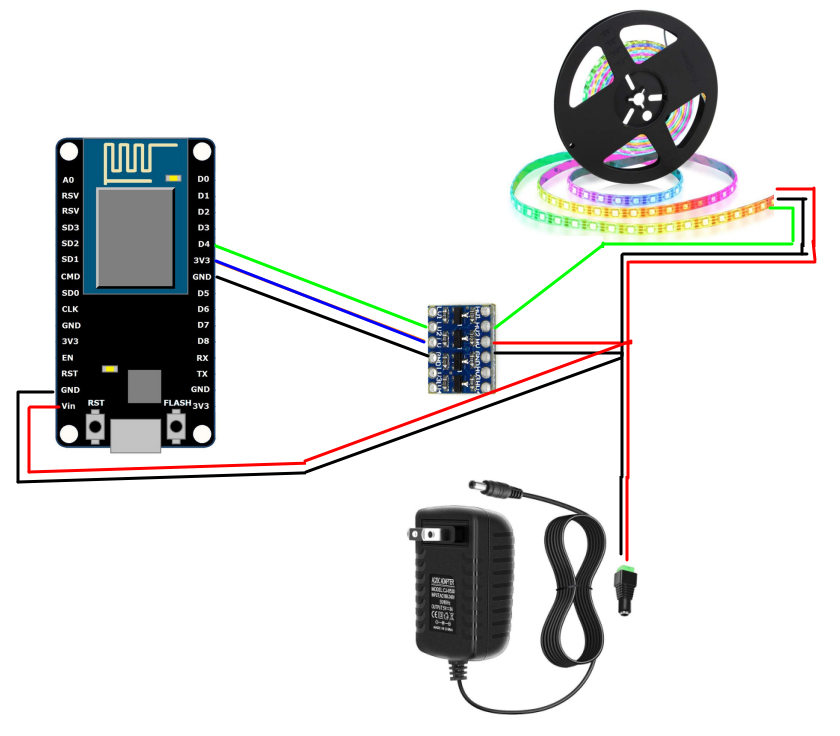
LEDs with a logic level shifter
As explained in the video, the logic level shifter boosts the output of the data wire to 5 volts. To do that, you need to take a 3.3v wire and ground, along with the data wire, and feed it into one end of the logic level shifter. The output then is 5v that you feed back to the main line and then the data wire goes off and can be very long (my outside wire run is ~25 feet without issues).
As an FYI in case you’re splitting your data wire, I found it was best to split the wire BEFORE you feed into the logic level shifter. I initially had mine done afterwards and i ran into problems. This was the board I used. Your results may vary.
For my indoor set of LEDs I really didn’t want to have to solder the pins to the logic level shifter board so I took a different path based on a Dr. ZZs’s video. Basically instead of a logic level shifter, if you use an LED wired near the ESP board it acts very similar to the logic level shifter in boosting the voltage on the data wire. Jump to 11:00 in the video for an explanation/visual demo.
I’m a visual person so again here’s a wiring diagram for you to look at.
Wiring with a sacrificial pixel
Note that WLED allows you to turn off the first LED in settings (probably for this reason). For ESP Home I set up a light partition to handle.
Also, to stress using the proper wire gauge, don’t be like me. Otherwise you end up with this:
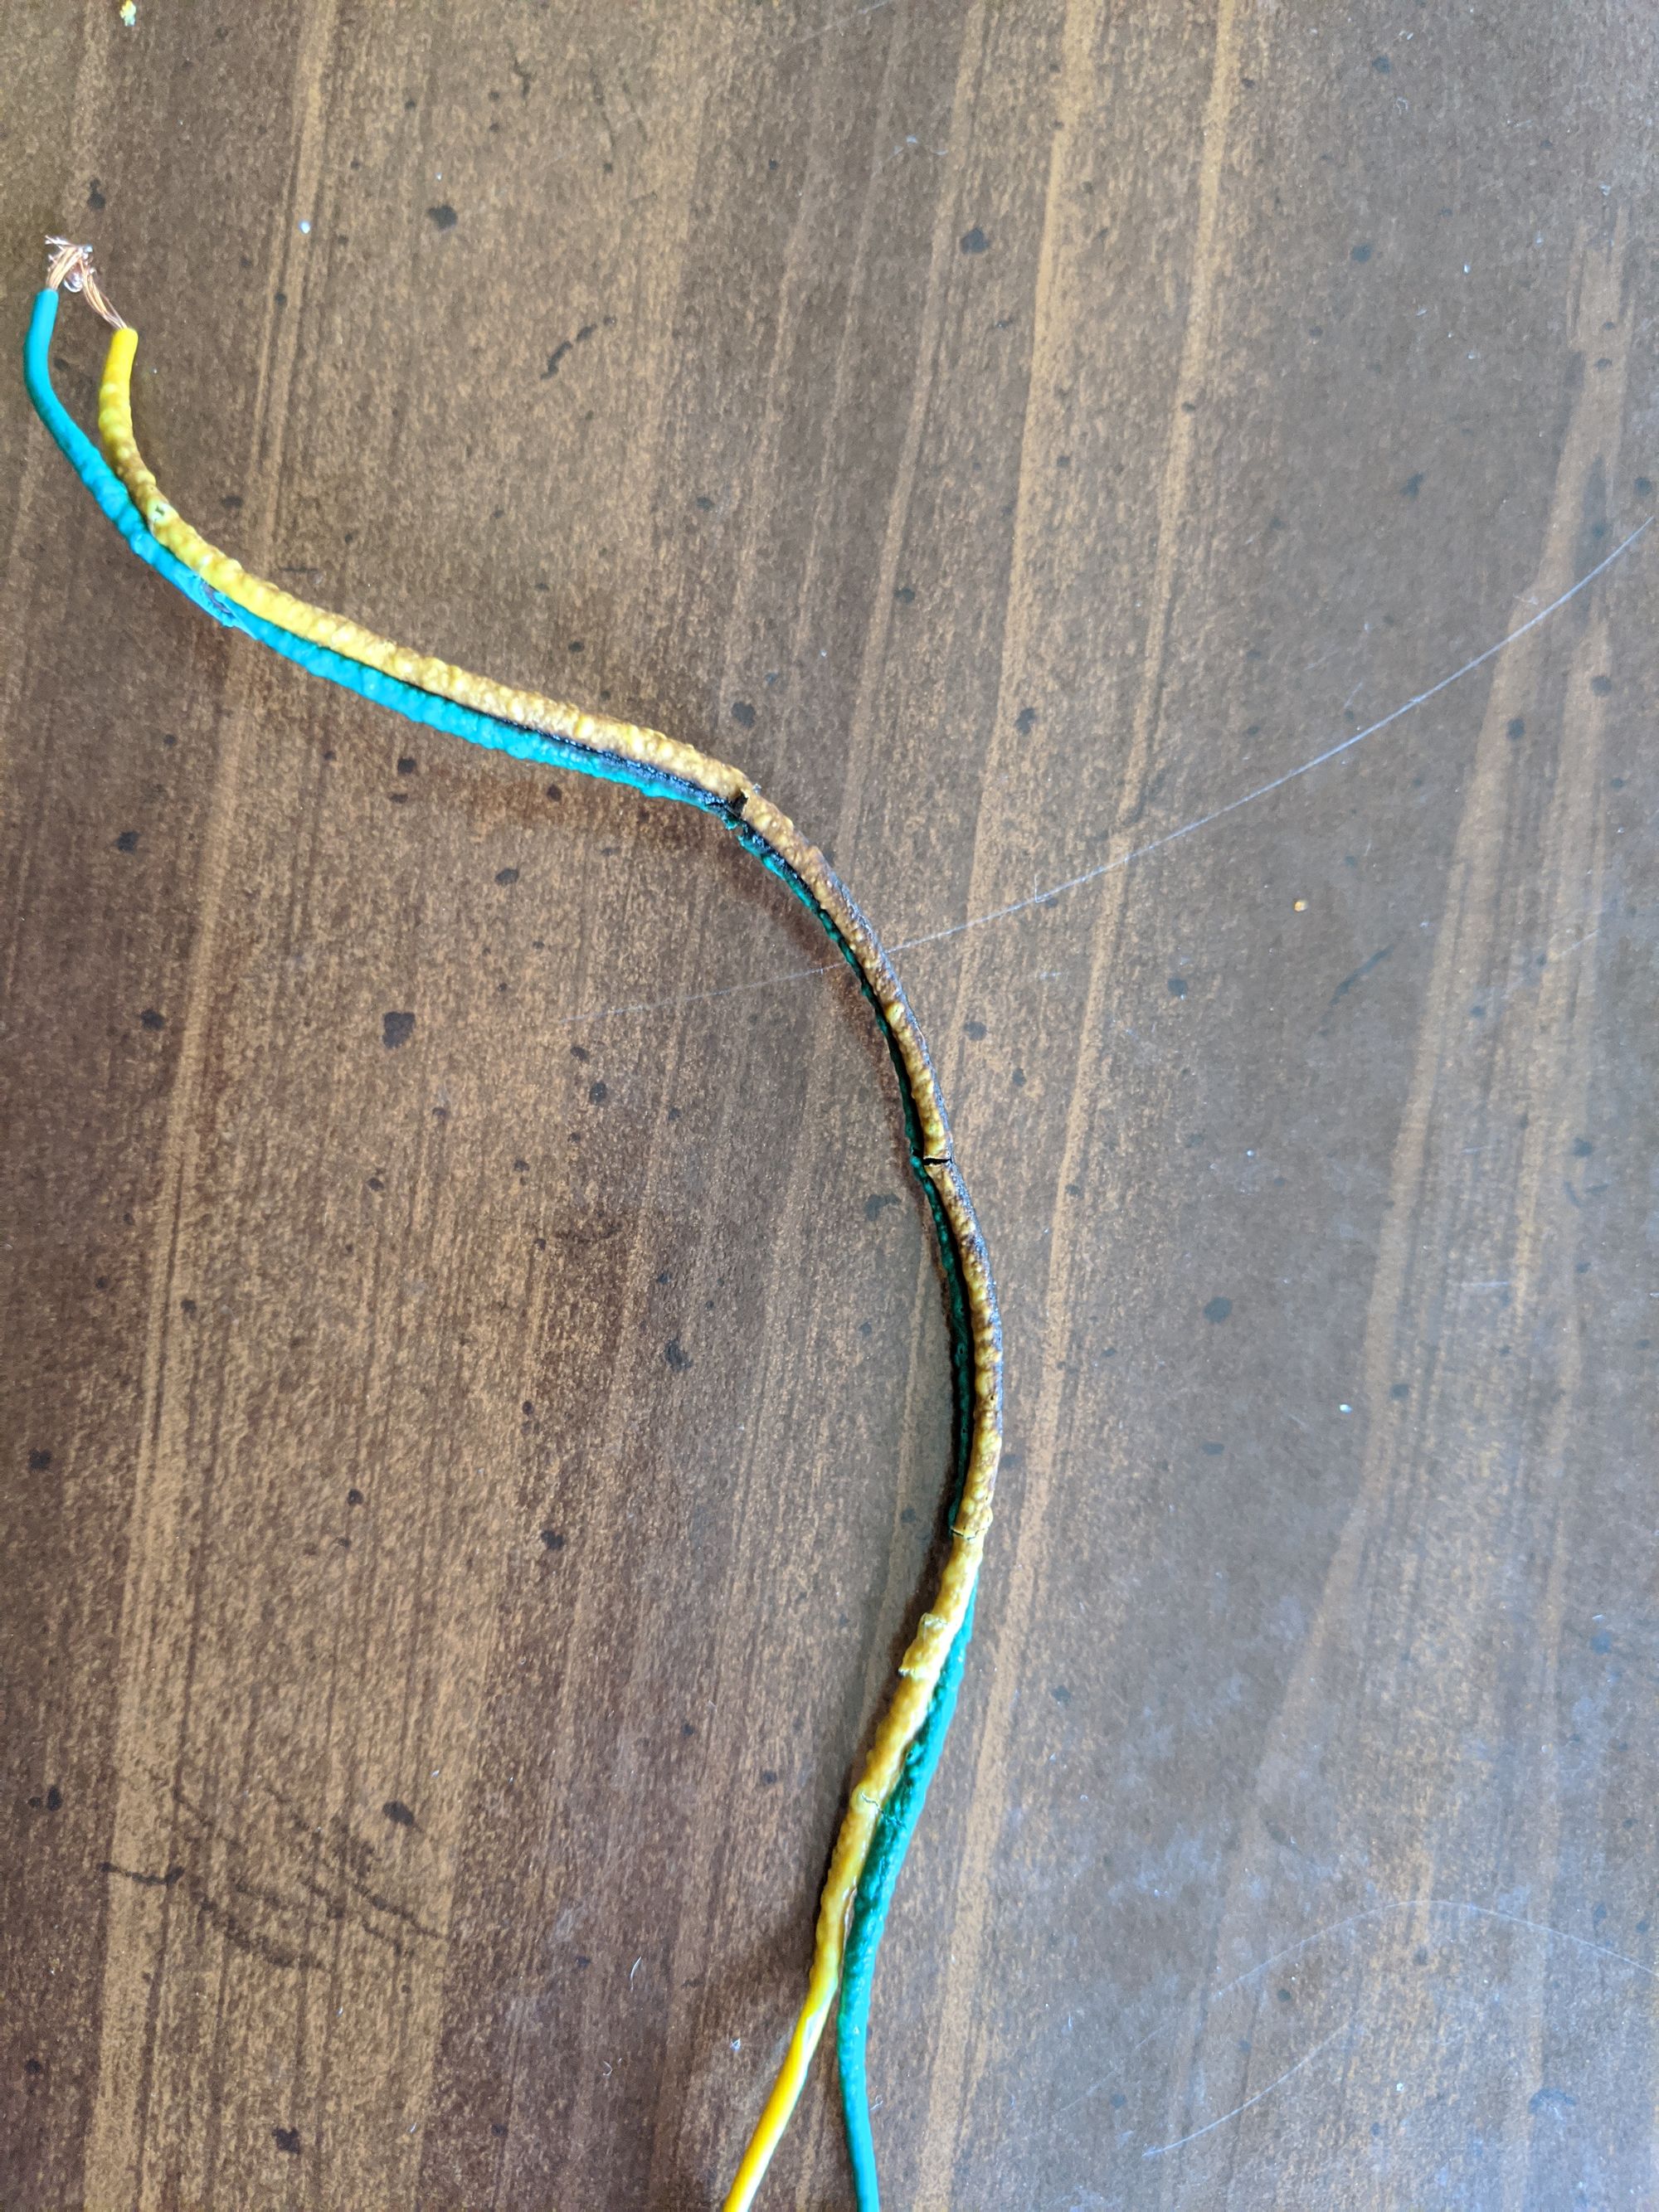
Oops.
Results
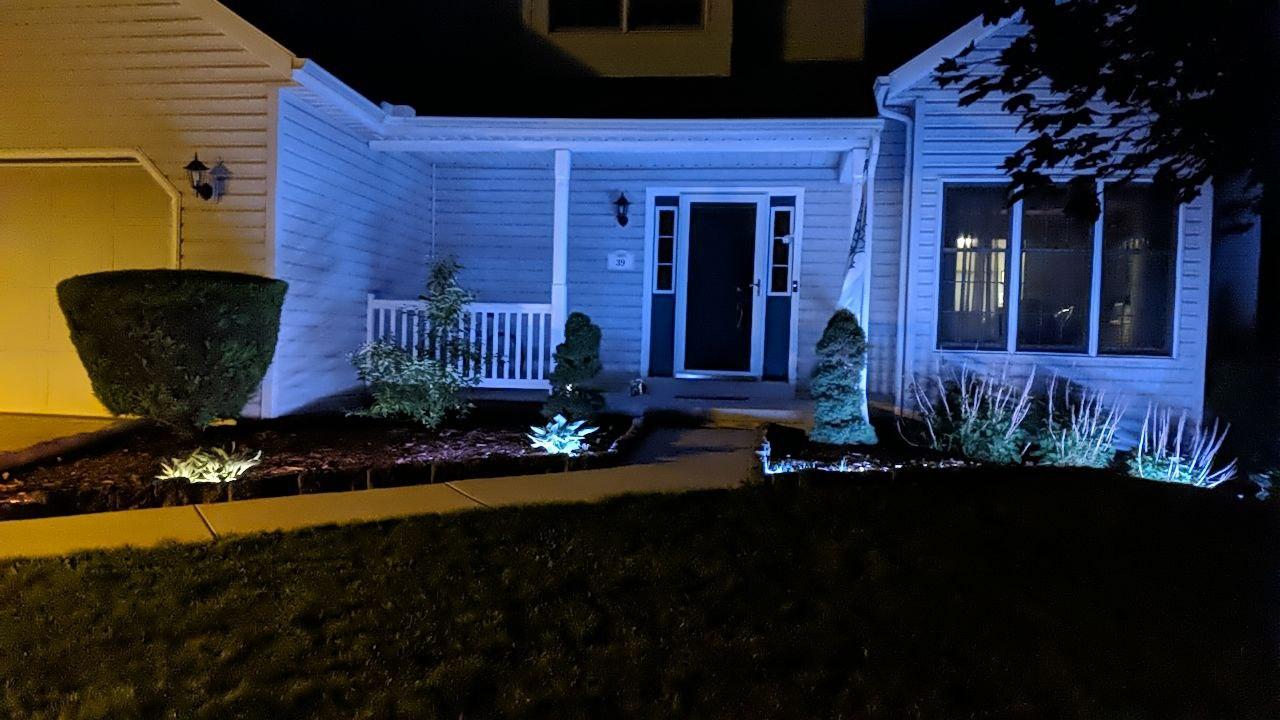
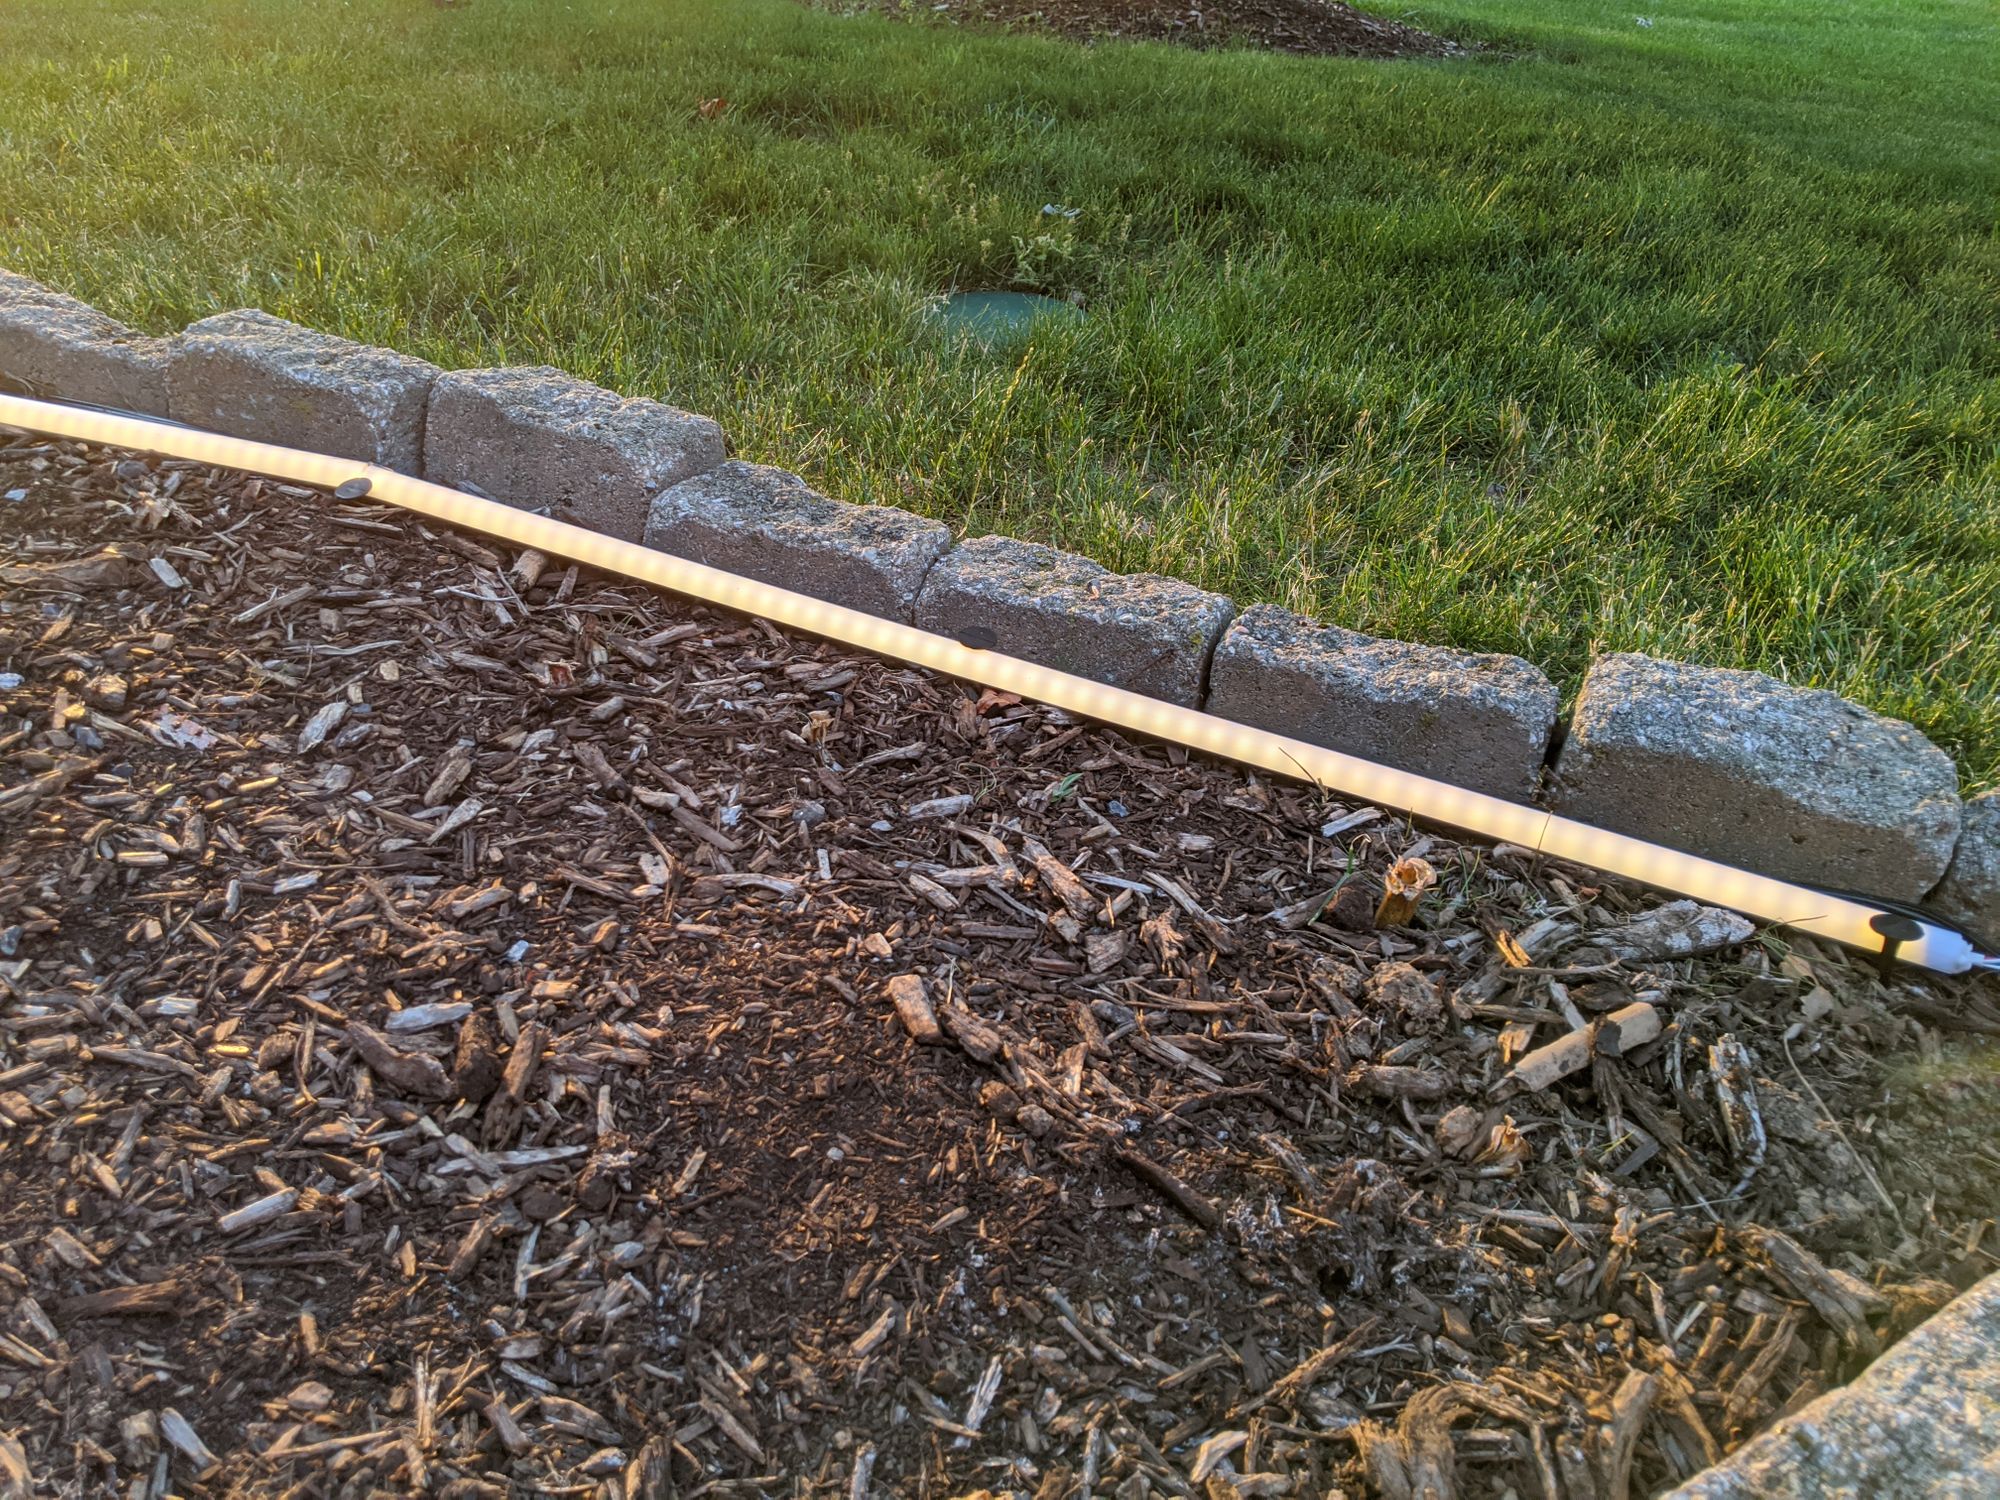
Here’s my final result for the outside project:
Yes the wiring in the box is ugly (and I can probably cut it) but it works so I’m leaving it alone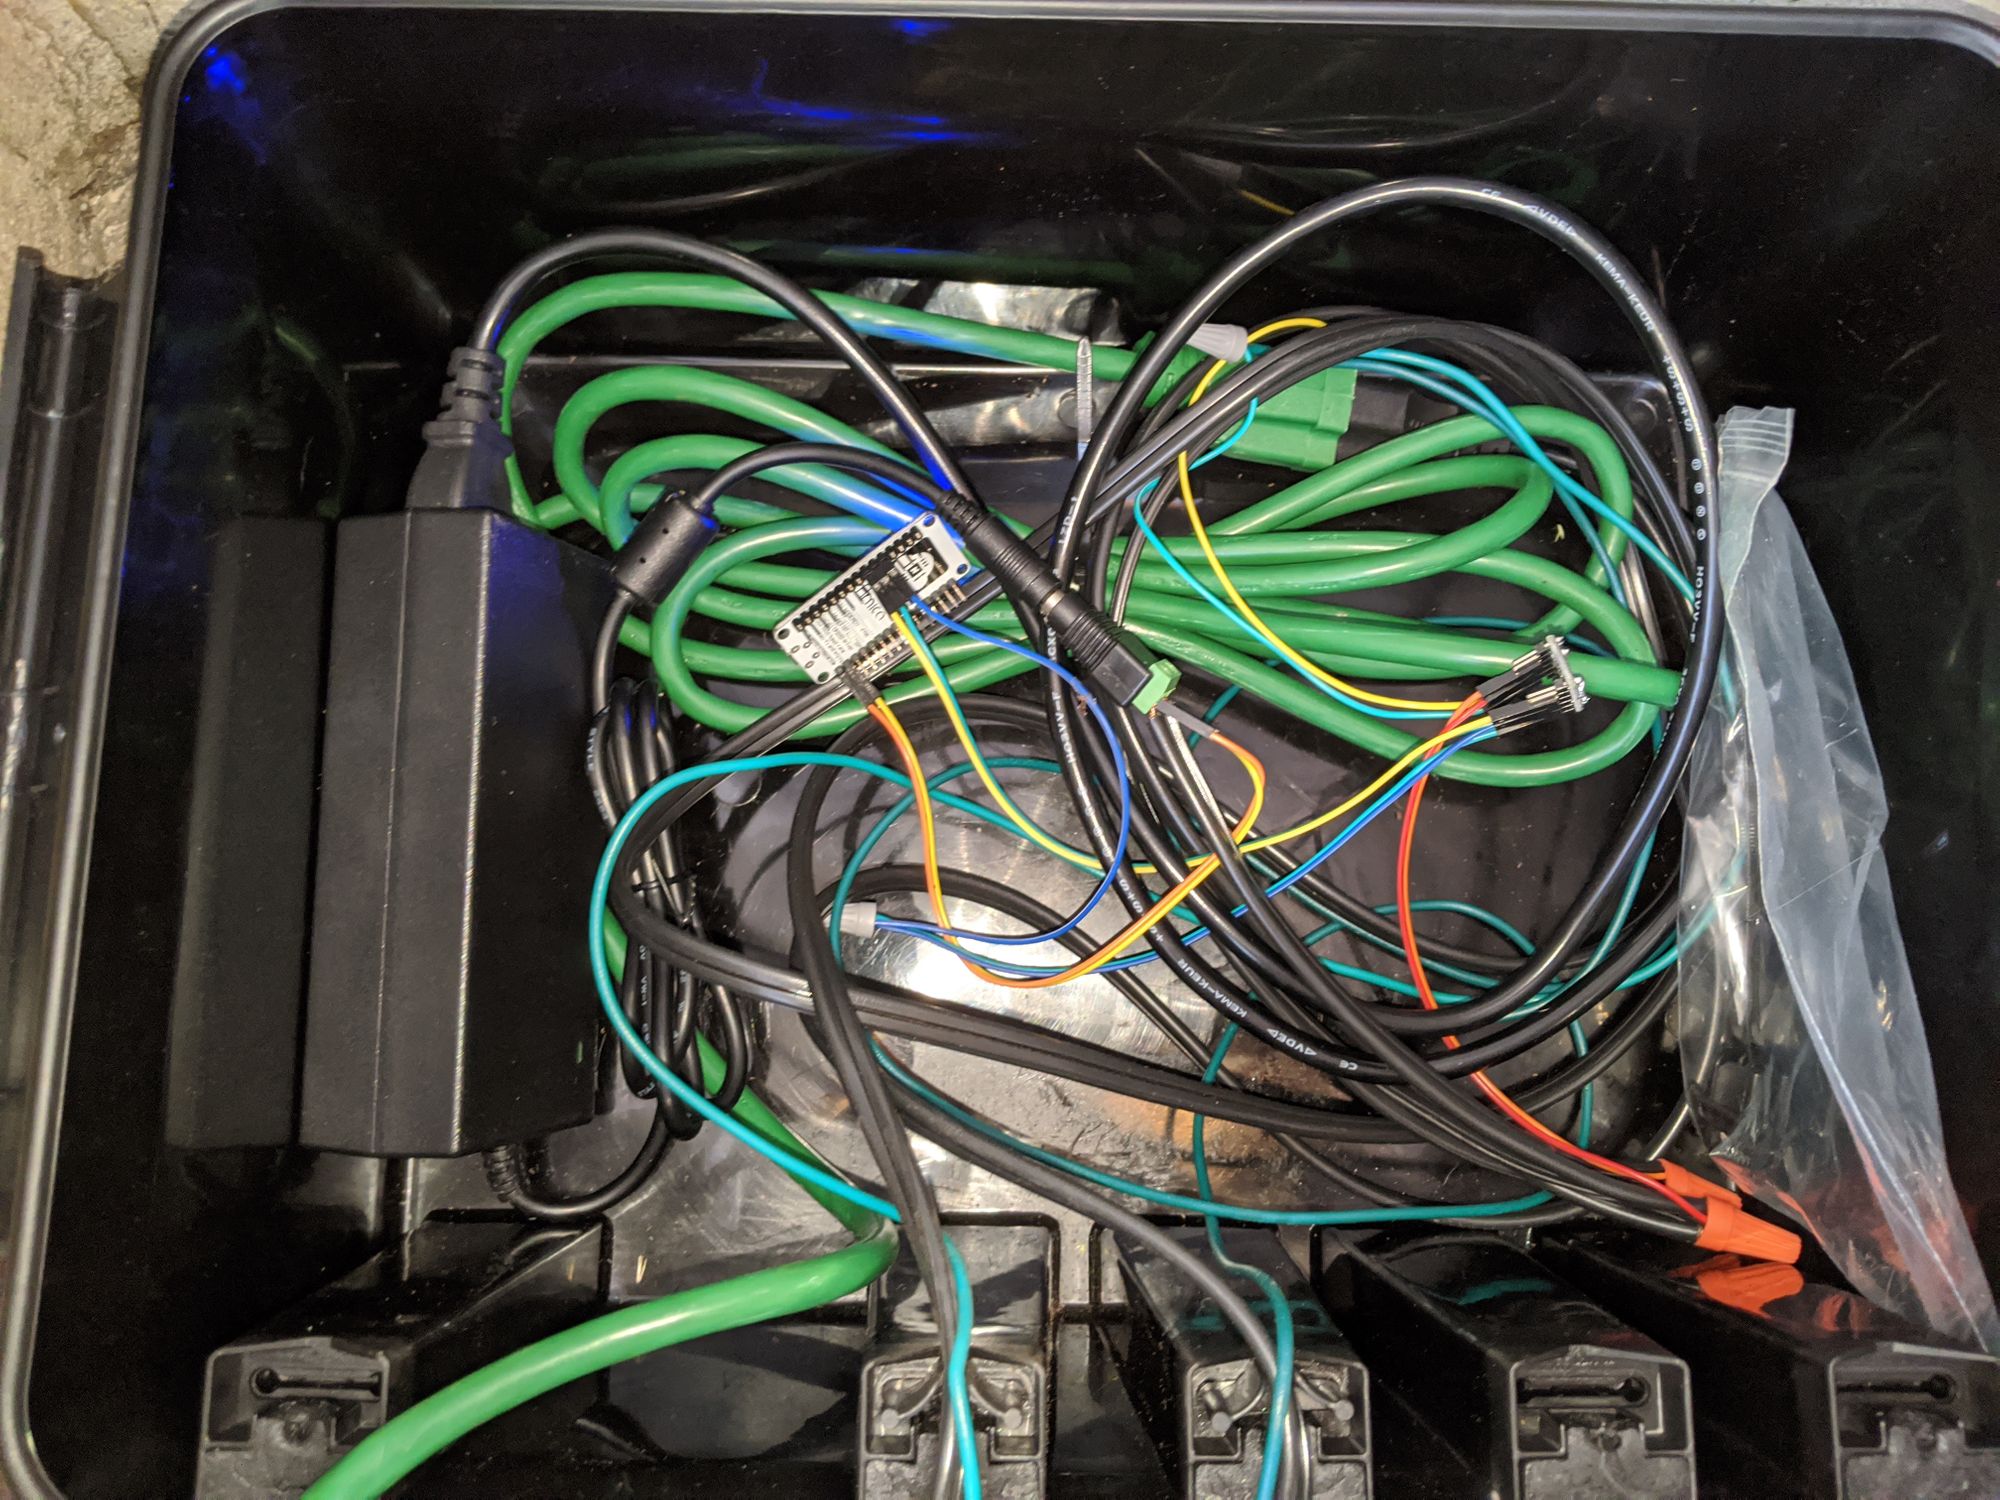
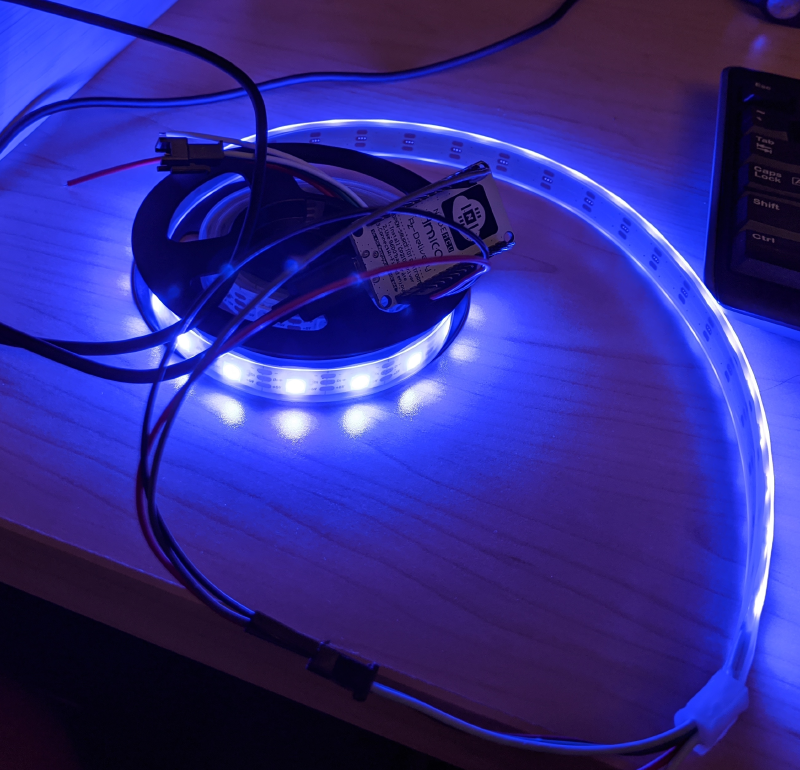
And inside:
Here’s an example of the wiring with sacrificial pixels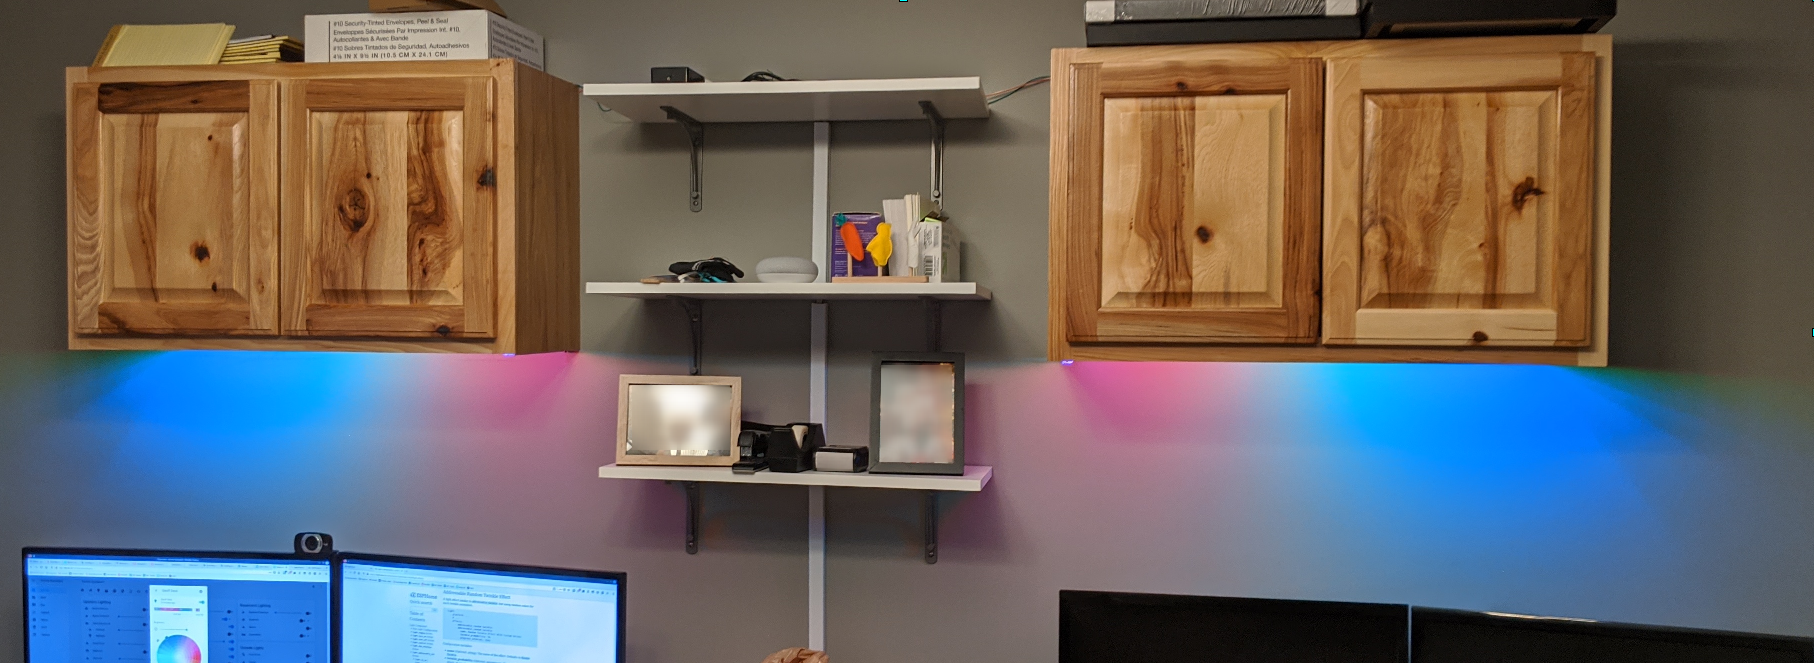
![]()
Conclusion
These were not easy projects for me, but ultimately I learned a LOT. I’m debating expanding the outdoor LED setup for a holiday display but not sure I want to take on that hassle/headache. I do think my next project is going to be under the bed LEDs that come on when the SO or I get out of bed at night (turn on dim red for night vision). I mean, I already have the ESP board just sitting there waiting….hahaha.
Hope this is useful to some who are considering taking on an LED project of their own.